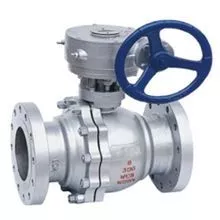
Ball Valve Maintaining
Notes of ball valve maintenance
Except the regular operating conditions, keeping a concordant temperature or pressure ration, and rational corrosion data, the following tips are also unavoidable to make ball valve have a long service life time and extend its repairing period:
Under the ball valve’s inactive statement, the internal parts still exists pressure fluid.
Before maintaining the ball valve, relieve the pipeline pressure, and make the ball valve in the opening position.
Before maintaining the ball valve, relieve the pipeline pressure, and make the ball valve in the opening position.
Disconnect the power supply or air source before repairing the ball valve.
Separate the actuator from the valve holder before maintenance.
Firstly, check the pressure uploaded on the ball valve and the downstream piping, then the dismantling operations.
While decomposing and reassembling, be careful to prevent the sealing surface of the components from damage, particularly the nonmetal parts, use the special tools when taking out the O shape ring.
The bolt on the flange should be screwed down in balance, equable and gradual when assembling the ball valve.
The detergent should be compatible with the rubber part, plastic parts, metal parts and working medium inside of the ball valve. If the working medium is fuel gas, use gasoline to clean the metal parts. Use purified water or ethyl alcohol to wash the nonmetal parts.
Immerse the single parts for cleaning after decomposing. Use fine scrub silk with detergent to clean the metal parts of un-decomposing nonmetal parts (avoid the fiber fall off and adhere to the components). Wiping off all grease, dirt, gum deposit and fine dust sticking to the wall while cleanout.
Take out the nonmetal parts right away from detergent after washing, do not immerse them for a long time.
Assemble it until washing wall volatilizes from all detergent (can also mop it with a clean silk), be sure not to wait for a long time unless it will be rust and polluted by fine dust.
Clean up the new parts before assemble
Use grease for lubrication. The grease and should be compatible with metal material, rubber parts, plastic parts and working medium are ball valve.
Using gas for working medium, 221 lubricating grease is available. Besmear on the surface of sealing installation groove with a thin layer of grease, apply a thin layer of grease on rubber seal components, and valve stem’s sealing face and friction surface coated with a thin layer of grease.
While assembling, it is not allowed to have metal scraps, fiber, oil (except regulations using) fine dust and other impurities, foreign bodies which would pollute, adhere, or stay on the parts surface, or inside of the lumen.
1). Lock tightly the padding place
If the padding place has a tiny leakage occurs, lock tightly valve-stem nut again. Note: do not be too tight lock, , usually 1/4 to one circle then reveal will stop.
2). Replace valve seat and seal
A). Dismantle
Make the valve in a partially open position, flushing, remove the possible dangerous substances inside and outside of the body.
Close the ball valve, pull down on both screw bolt and nut where the flange connected, and completely remove the valve from the pipeline
Remove drive actuator, bracket, washer, stem nut, butterfly, shrapnel, south, wear-resisting, stem packing by the order.
Remove the cover body connected to bolts and nuts, separate the bonnet from valve body, and remove the valve cover gasket.
Be sure that the ball valve in the "off" position, it can be more easily out from the body, remove the seat.
Pull down the valve rod lightly from the hole of valve body until being completely removed, and then remove the o-rings and valve stem packing.
Notes: Please be careful for operation in order to avoid scratch valve stem surface and stuffing-box sealing parts.
B). Reassemble
Clean and double check the removed parts, strongly recommend wrapped spare parts to replace the valve seat, valve cover gasket seals, etc.
Assemble it by the opposite order.
Use specified torque, lock crossly the flange and connect to the bolt.
Use specified torque, lock the valve-stem nut.
After the installation of actuators, input the corresponding signal through the rotary valve rod drives the valve core to rotate, make the valves to open and closed position.
If possible, please have a test for pressure seal and valve performance according to the relevant standard before returning the pipe.

